As dog parents, we all want the best for our furry family members. That often includes finding healthy, delicious treats that make their tails wag without worrying about mystery ingredients. Store-bought treats can sometimes contain preservatives, fillers, or artificial flavors that we’d rather avoid. But what if you could whip up something amazing, super nutritious, and incredibly simple right in your own kitchen?
Good news! You absolutely can. This recipe for 4-Ingredient Tuna Dog Treats is a game-changer. It’s easy, affordable, and uses wholesome ingredients you probably already have on hand. Your dog will be begging for more, and you’ll feel great knowing exactly what they’re enjoying.
Why Homemade Treats are a Tail-Wagging Idea
There’s something truly special about giving your dog a treat you’ve made yourself. It’s not just about the love you bake into them, though that’s certainly a big part of it! Homemade treats offer several fantastic benefits that make them worth the little effort.
Firstly, you get complete control over the ingredients. No more scanning confusing labels or wondering what ‘natural flavors’ really means. You choose fresh, wholesome components, ensuring your dog gets only the good stuff. This is especially important if your dog has allergies or dietary sensitivities.
Secondly, homemade treats can often be more cost-effective in the long run. While premium store-bought treats can be quite pricey, simple recipes using common pantry items can save you a bundle. Plus, you can make them in batches and store them for future use.
Finally, the joy your dog gets from a special homemade snack is unparalleled. They can sense your effort and love, turning treat time into an even more meaningful bonding experience. It’s a win-win for everyone!
The Power of Tuna: Why It’s Great for Your Dog
Tuna might seem like a human-only food, but it can be a wonderful, nutrient-rich addition to your dog’s treat repertoire when prepared correctly. It’s packed with benefits that contribute to your dog’s overall health and vitality. Of course, moderation is always key, but as an occasional treat ingredient, tuna really shines.
Nutritional Boosters in Tuna
- Omega-3 Fatty Acids: Tuna is an excellent source of omega-3s, specifically EPA and DHA. These essential fatty acids are fantastic for promoting healthy skin and a shiny coat, reducing inflammation, and supporting joint health. They’re also crucial for brain development in puppies and cognitive function in older dogs.
- Lean Protein: Dogs need protein for strong muscles, healthy tissue repair, and energy. Tuna provides a high-quality, lean source of protein that helps keep your dog feeling full and satisfied without excess fat.
- Vitamins and Minerals: Tuna offers a good dose of B vitamins (like Niacin and B12) important for metabolism and nerve function, as well as minerals such as selenium and phosphorus, which play roles in antioxidant defense and bone health, respectively.
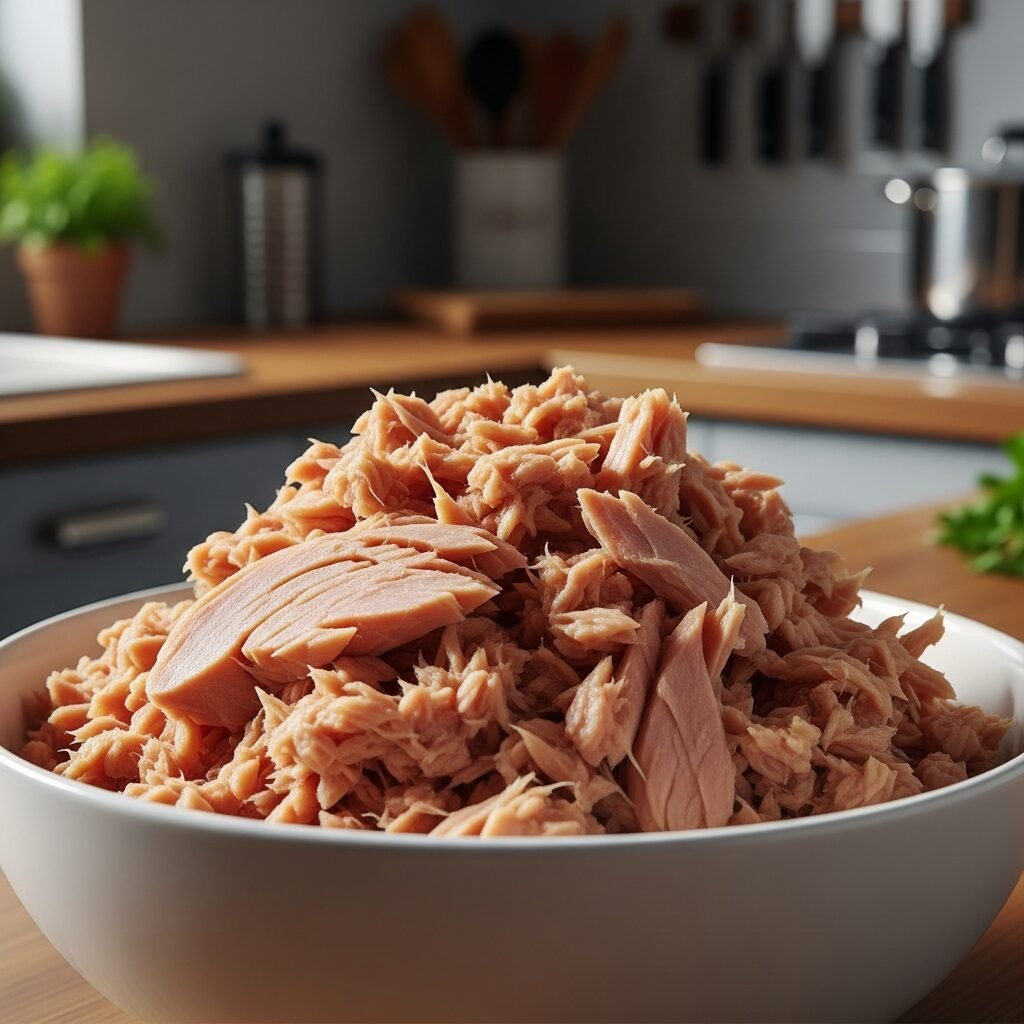
Choosing the Right Tuna for Your Canine Friend
Not all tuna is created equal when it comes to your dog. It’s crucial to select the right kind to ensure it’s safe and healthy. Here’s what to look for:
- Packed in Water, Not Oil: Always choose tuna packed in water. Tuna in oil (like olive oil or sunflower oil) can add unnecessary fats and calories that your dog doesn’t need.
- Low Sodium: Look for ‘low sodium’ or ‘no salt added’ varieties. High levels of sodium can be harmful to dogs.
- Drained Thoroughly: Even if it’s packed in water, always drain the tuna thoroughly before using it. This removes any excess salt or liquids.
- No Added Spices or Flavors: Stick to plain tuna. Avoid any varieties with added spices, herbs, or flavorings like lemon or pepper, as these can be toxic or irritating to dogs.
Light tuna (like skipjack) is generally preferred over albacore for dogs due to its lower mercury content. While small amounts of tuna are fine, consistently feeding large fish like albacore can lead to mercury accumulation over time. For treats, a can of light tuna is perfectly safe and beneficial.
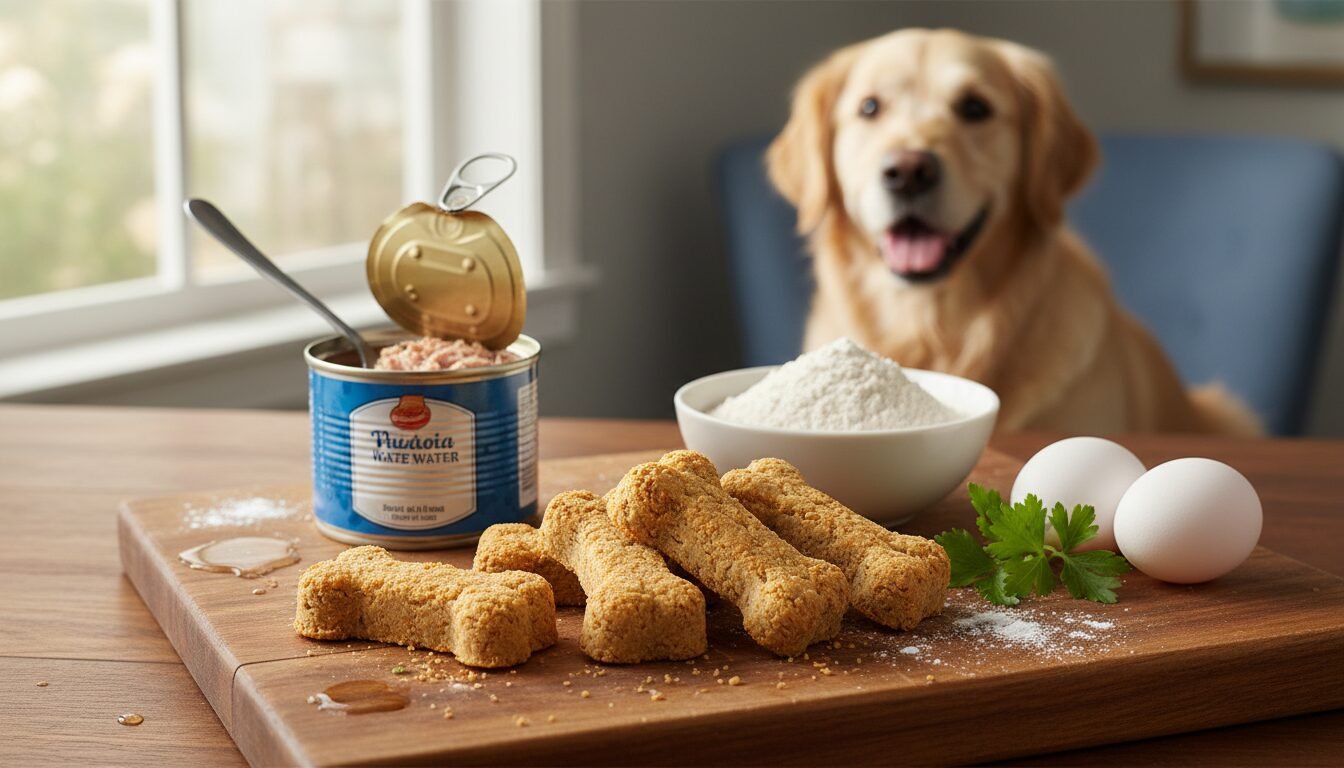
The Four Simple Ingredients You’ll Need
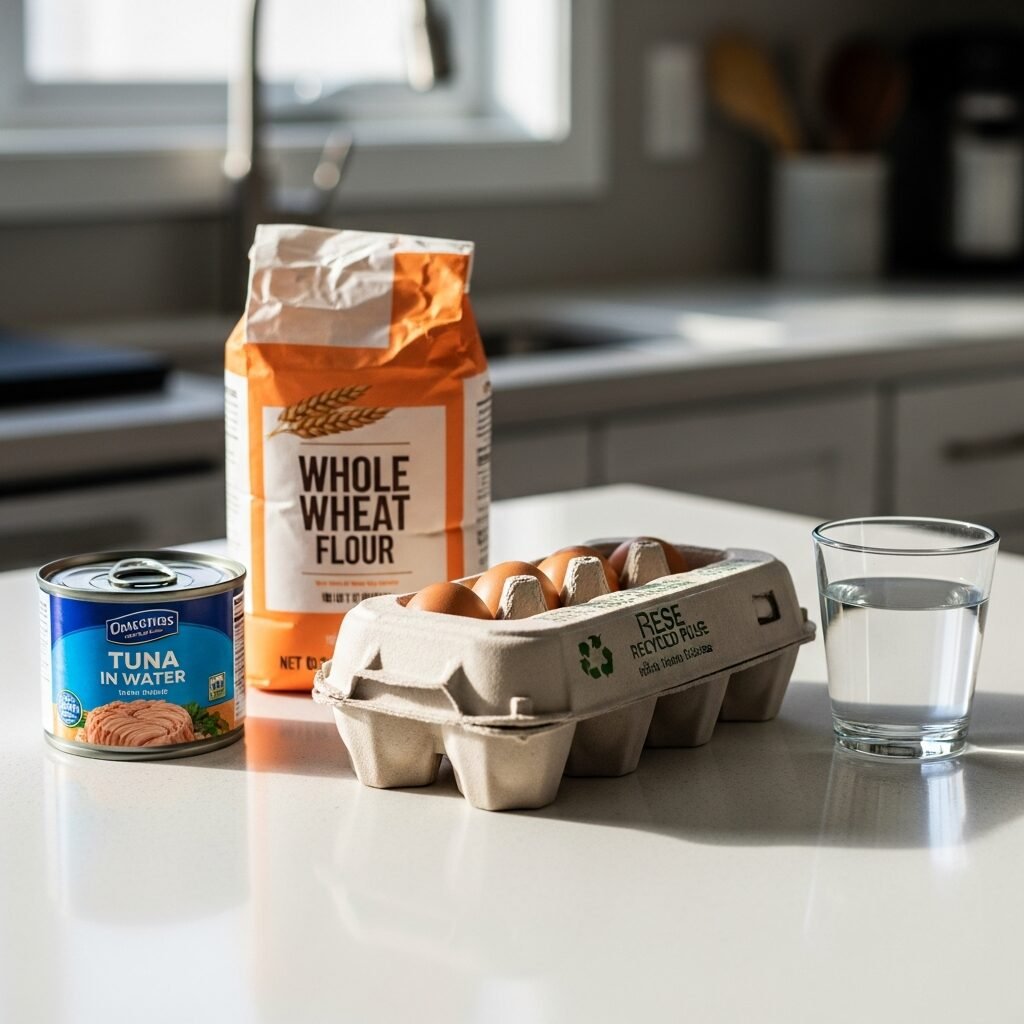
The beauty of this recipe lies in its simplicity. You only need four basic ingredients to create these wholesome, delicious treats. Let’s break down each one and what it contributes:
- 1 (5-ounce) can of Tuna (packed in water, thoroughly drained)
- 1 cup Whole Wheat Flour (see notes on alternatives if your dog is sensitive to wheat)
- 1 large Egg
- 2-3 tablespoons Water (or low-sodium, dog-safe broth for extra flavor)
Ingredient Spotlight: What Each One Brings to the Bowl
Tuna (packed in water, drained): This is our star ingredient, providing the irresistible flavor and a powerful punch of lean protein and essential omega-3 fatty acids for a healthy coat and joints. Draining it well is key to keeping the treats just right.
Whole Wheat Flour: This acts as the primary binder, holding everything together to form a dough that you can roll and cut. Whole wheat flour also adds a little extra fiber. If your dog has a sensitive stomach or wheat allergies, don’t worry – we’ll discuss great alternatives later.
Egg: Eggs are a fantastic natural binder that helps the treats hold their shape during baking. They also contribute additional protein and a good array of vitamins and minerals, boosting the nutritional value of each bite.
Water (or low-sodium broth): This is crucial for achieving the right dough consistency. Depending on how well you’ve drained your tuna and the humidity, you might need slightly more or less. Using a low-sodium chicken or beef broth (ensure no onion, garlic, or other harmful ingredients) can also add another layer of savory flavor your dog will adore.
Step-by-Step Guide: Making Your Tuna Treats
Get ready to unleash your inner baker! This recipe is incredibly straightforward, even if you’re not a seasoned pro in the kitchen. Your dog will think you’re a culinary genius.
Gathering Your Tools
- A large mixing bowl
- A fork or potato masher
- Measuring cups and spoons
- Baking sheet
- Parchment paper or silicone baking mat
- Rolling pin (optional, but helpful for even thickness)
- Small cookie cutters (bone, paw print, or circle shapes are fun) or just a knife to cut squares.
The Simple Baking Process
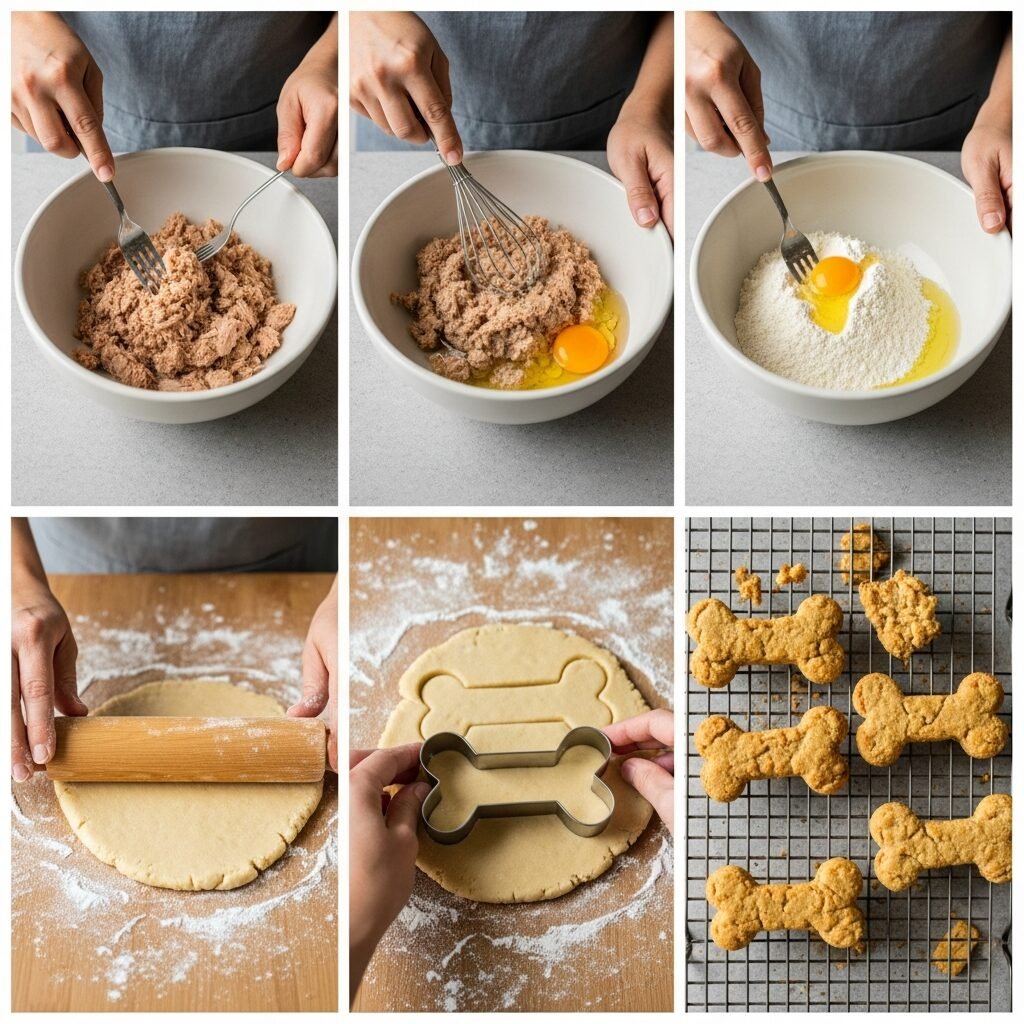
1. Preheat Your Oven: Start by preheating your oven to 350°F (175°C). Line a baking sheet with parchment paper or a silicone baking mat. This prevents sticking and makes cleanup a breeze.
2. Prepare the Tuna: Open your can of tuna (packed in water) and drain it really well. You want to remove as much liquid as possible. Transfer the drained tuna to your mixing bowl and use a fork or potato masher to mash it thoroughly. You want it to be flaky, not chunky.
3. Combine Wet Ingredients: To the mashed tuna, add the large egg and 2 tablespoons of water or broth. Mix everything together until it’s well combined and forms a moist, crumbly mixture.
4. Gradually Add Flour: Slowly add the whole wheat flour to the tuna mixture, about half a cup at a time, mixing well after each addition. You’ll notice the mixture start to come together into a dough. If the dough seems too dry and crumbly to form, add the remaining tablespoon of water/broth, one teaspoon at a time, until you get a workable dough consistency. It should be firm but not sticky.
5. Roll and Cut (or Drop): Lightly flour your work surface and your rolling pin. Turn the dough out onto the surface and roll it to about 1/4-inch thickness. Use your cookie cutters to cut out desired shapes. If you don’t have cookie cutters, you can simply use a knife to cut the dough into small squares or rectangles. Alternatively, for a rustic look, you can drop small spoonfuls of the dough directly onto the baking sheet.
6. Bake to Perfection: Carefully place your cut-out treats onto the prepared baking sheet. Bake for 15-20 minutes, or until the treats are firm to the touch and lightly golden brown around the edges. The baking time can vary depending on the thickness and size of your treats, so keep an eye on them.
7. Cool Completely: Once baked, remove the treats from the oven and transfer them to a wire rack to cool completely. This is a crucial step! Allowing them to cool fully helps them firm up and prevents them from becoming soggy during storage. They should be hard and crunchy when fully cooled.
Storage Tips for Freshness
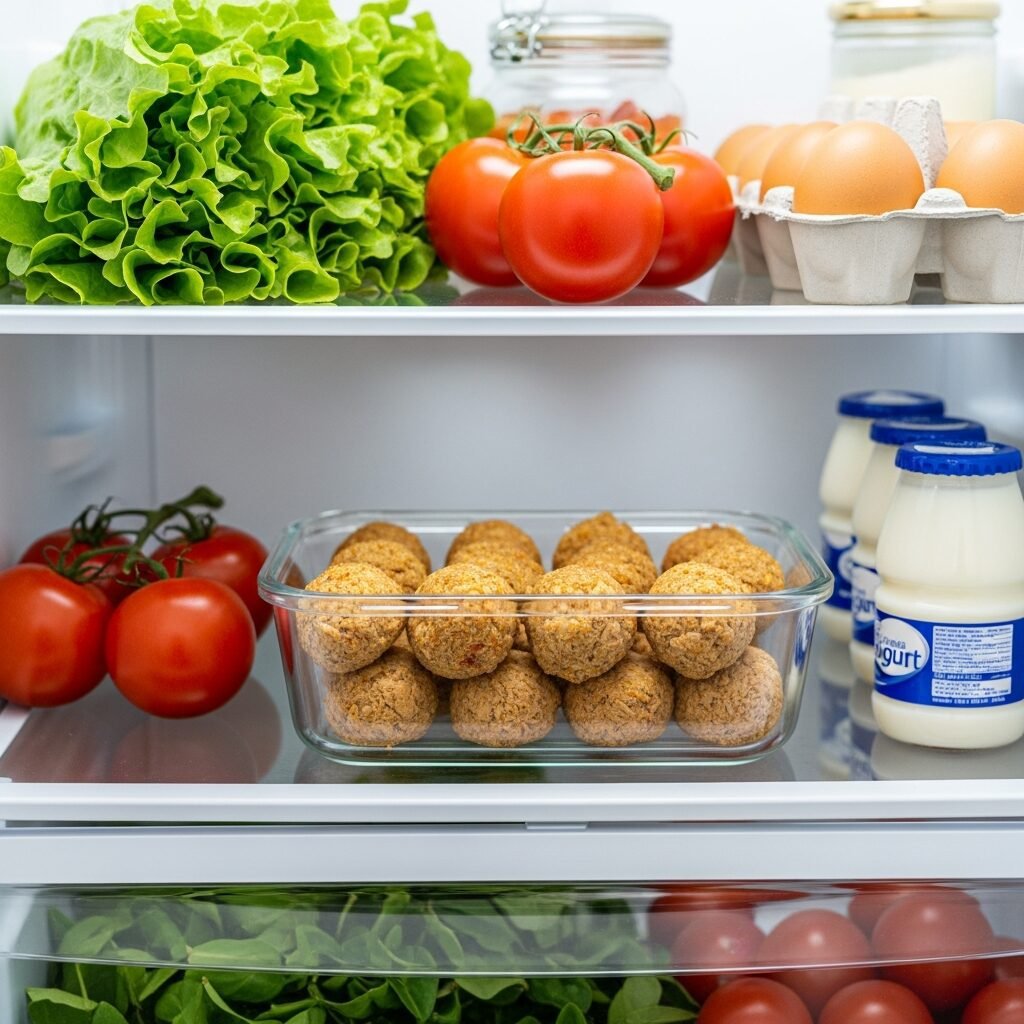
Now that you’ve put in the effort to make these fantastic treats, you’ll want to make sure they stay fresh and delicious for your pup. Proper storage is key to extending their shelf life and preventing spoilage.
- Airtight Container: Always store the cooled treats in an airtight container. Exposure to air can make them go stale faster.
- Refrigerator: For immediate use, store the treats in the refrigerator for up to 5-7 days. Because they contain fresh ingredients like tuna and egg, they won’t last as long at room temperature.
- Freezer: For longer storage, these treats freeze beautifully! Place them in a single layer on a baking sheet to freeze for about an hour until solid, then transfer them to a freezer-safe bag or container. They can be stored in the freezer for up to 2-3 months. Thaw them in the refrigerator overnight or simply offer them frozen as a cooling chew treat on a hot day (if your dog can handle frozen treats).
Always check for any signs of mold or an unusual smell before giving them to your dog, especially if they’ve been stored for a while. When in doubt, it’s always best to toss them out.
Customizing Your Tuna Treats: Safe Additions and Substitutions

One of the best parts about making homemade treats is the ability to customize them! You can easily tweak this recipe to suit your dog’s preferences or dietary needs. Just remember to always introduce new ingredients slowly and in small amounts.
Flavor Boosters (Optional, Safe for Dogs)
- Fresh Parsley: A pinch of finely chopped fresh parsley can not only add a touch of green but also help with doggy breath!
- Shredded Carrot: For added crunch, vitamins, and fiber, stir in a tablespoon or two of finely shredded carrot. Carrots are a great source of beta-carotene.
- A Pinch of Dried Kelp Powder: Kelp is a superfood packed with minerals and can support thyroid health. A tiny amount (1/4 teaspoon for the whole batch) is usually sufficient.
- Oatmeal: For a slightly chewier texture, you can replace about 1/4 cup of the flour with rolled oats (uncooked, plain).
Always avoid adding spices like garlic powder, onion powder, or excessive salt, which are toxic or harmful to dogs.
Flour Alternatives for Sensitive Stomachs
If your dog has a wheat allergy or sensitivity, or you simply prefer to avoid gluten, there are excellent flour alternatives you can use:
- Oat Flour: A fantastic gluten-free alternative that often works well for sensitive tummies. You can buy oat flour or make your own by blending plain rolled oats in a food processor until fine.
- Rice Flour: Another gluten-free option, rice flour (brown or white) can be a good substitute. It might result in a slightly different texture.
- Chickpea Flour (Gram Flour): This gluten-free flour is high in protein and can also be used. Ensure it’s pure chickpea flour with no other additives.
- Coconut Flour: While generally safe, coconut flour is highly absorbent, so you’ll need to use less of it (start with about half the amount of wheat flour) and potentially add more liquid to get the right dough consistency.
When substituting flours, the dough consistency might vary, so you may need to adjust the amount of water/broth slightly until you achieve a firm, workable dough.
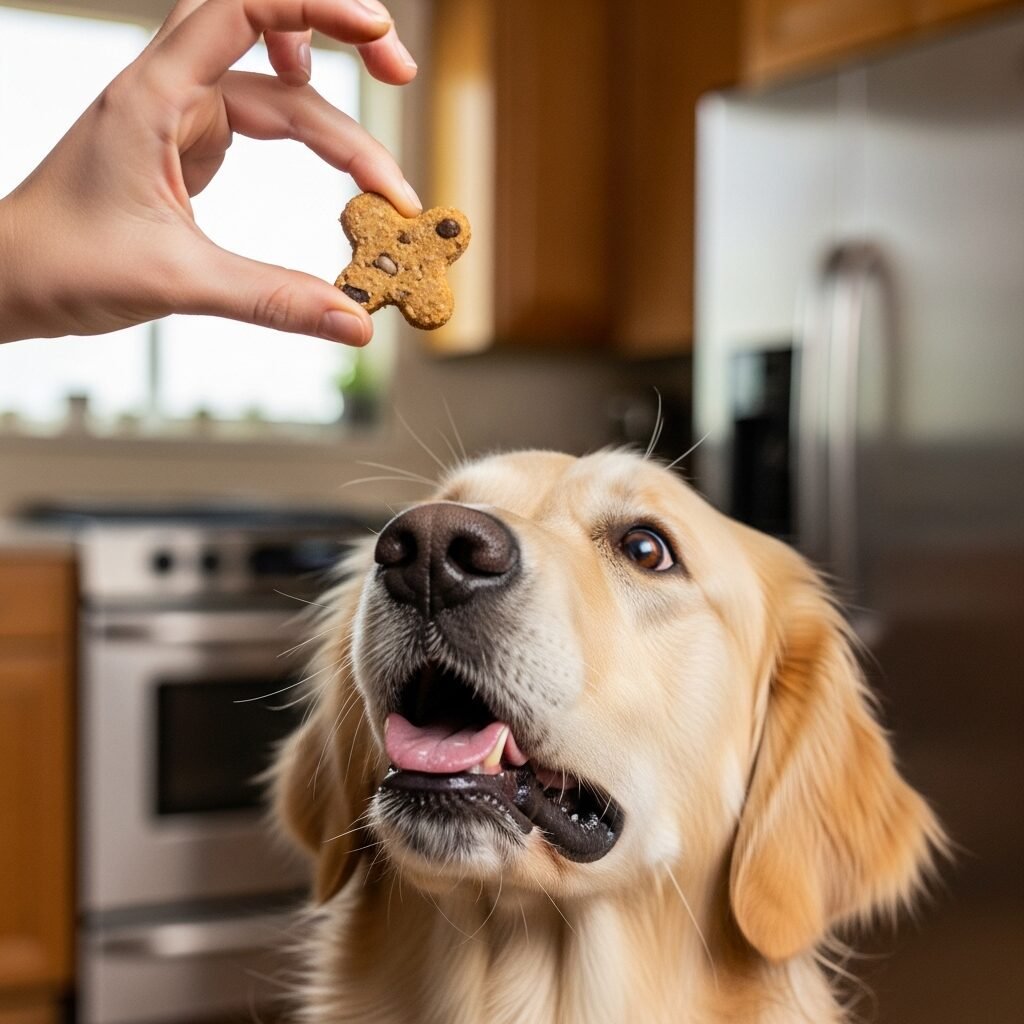
Serving Suggestions and Training Tips

These tuna treats are so versatile! Their small size and appealing scent make them perfect for various uses, from rewarding good behavior to simply showing your dog some love.
- Training Rewards: Their strong aroma makes them high-value treats, excellent for positive reinforcement during training sessions. Break them into even smaller pieces for quick rewards.
- Special Snacks: Offer them as an occasional special treat to brighten your dog’s day. They’re a healthy alternative to many commercial options.
- Puzzle Toy Fillers: Crumble them up and tuck them into a puzzle toy or Kong for an engaging mental exercise that smells irresistible.
- Medication Hiders: Their strong flavor might even help mask the taste of medications your dog needs to take.
Portion Control is Key
While these treats are healthy, they are still treats! They should only make up a small portion of your dog’s daily caloric intake – typically no more than 10%. Overfeeding treats, even healthy ones, can lead to weight gain and an imbalanced diet.
Consider your dog’s size, activity level, and overall diet when determining how many treats to give. For small dogs, one or two small treats a day might be plenty. Larger dogs can have a few more. If you’re unsure, it’s always a good idea to consult your veterinarian about appropriate portion sizes.
Important Safety Considerations

Your dog’s health and safety are paramount. While these tuna treats are generally safe and healthy, there are a few important considerations to keep in mind.
- Introduce New Foods Slowly: If your dog isn’t used to tuna or homemade treats, introduce these in very small quantities at first. This allows you to monitor for any digestive upset or allergic reactions.
- Watch for Allergies: Even wholesome ingredients can cause allergies in some dogs. Keep an eye out for signs like itching, redness, vomiting, or diarrhea after introducing new treats.
- Choking Hazard: Ensure the treats are a suitable size for your dog to chew and swallow safely. For very small dogs or puppies, break them into tiny pieces.
- Mercury Content: As mentioned, using light tuna (skipjack) packed in water and offering these treats in moderation helps minimize concerns about mercury exposure.
When to Consult Your Vet
- If your dog has any pre-existing health conditions (e.g., kidney disease, heart disease, severe allergies), always speak to your veterinarian before introducing new foods, even homemade treats.
- If you observe any adverse reactions after giving the treats, such as vomiting, diarrhea, excessive itching, or lethargy, stop feeding them immediately and contact your vet.
- For specific dietary restrictions or concerns about ingredient substitutions, your vet can offer tailored advice.