There’s something truly special about giving your dog a treat, isn’t there? That wagging tail, those bright eyes, the pure joy on their face – it’s one of the simplest pleasures of dog parenting. But sometimes, when we look at the ingredient list on store-bought treats, it can feel a little complicated, full of words we don’t recognize.
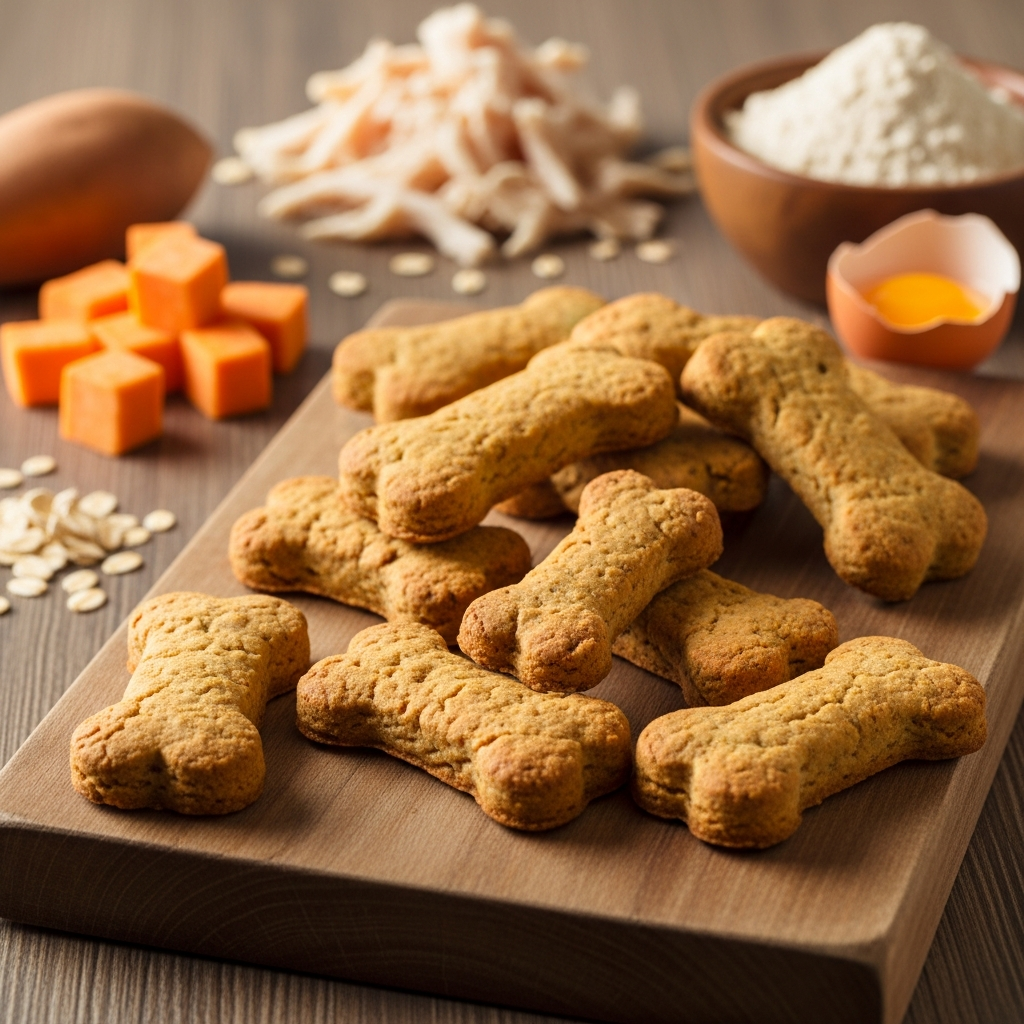
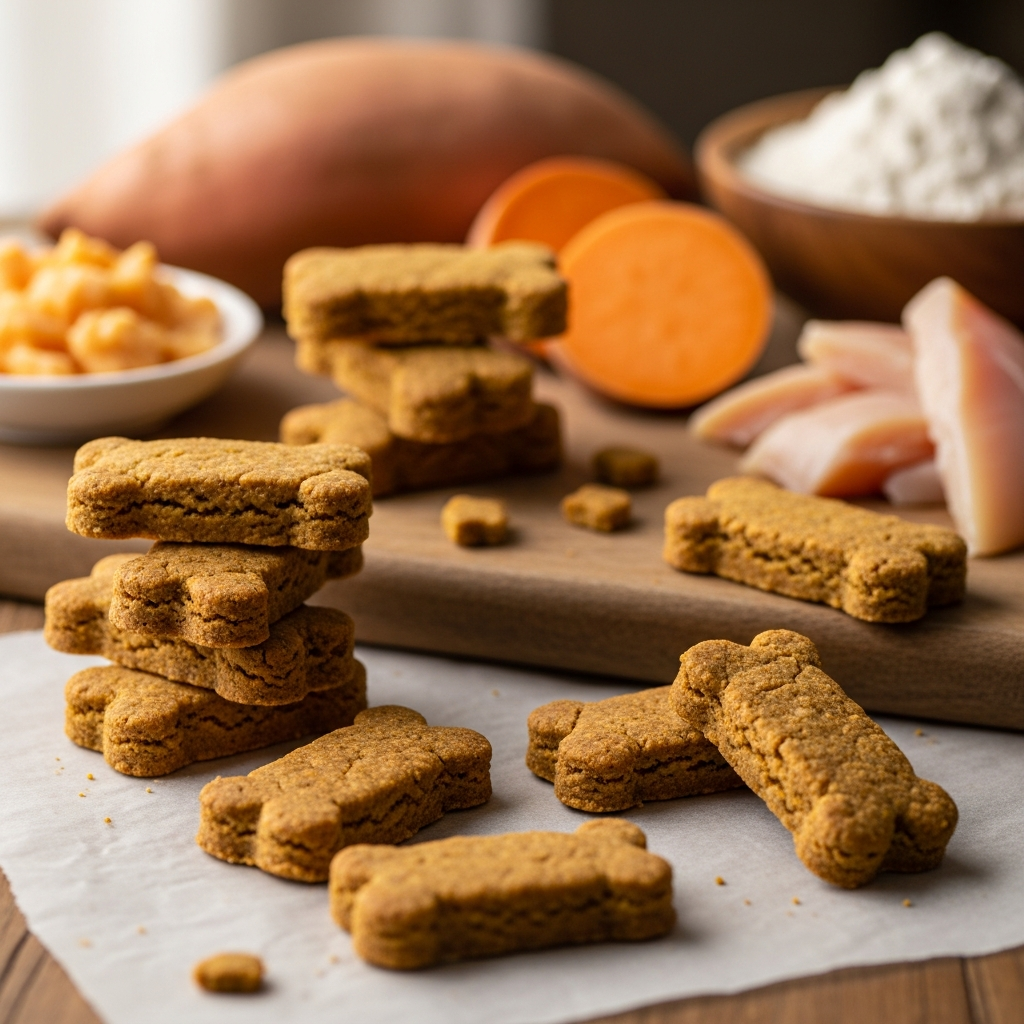
That’s why homemade treats are such a wonderful option! Imagine offering your furry best friend a delicious, wholesome snack you made yourself, knowing exactly what went into it. These 4-Ingredient Sweet Potato & Chicken Dog Biscuits are not only incredibly simple to make but also packed with goodness your dog will adore. Get ready to become your pup’s favorite baker!
Why Homemade Dog Treats Are Best
Making your dog’s treats at home is a fantastic way to show them extra love and care. It gives you peace of mind and allows for a more personalized approach to their diet.
Control Over Ingredients
One of the biggest advantages of baking for your dog is knowing precisely what they’re eating. You can say goodbye to hidden preservatives, artificial colors, mystery meat by-products, and unnecessary fillers that often appear in commercial treats. This means less worry about potential stomach upsets or allergic reactions.
You get to choose fresh, high-quality components. This control is especially valuable if your dog has specific dietary needs, allergies, or sensitivities, as you can easily adapt the recipe.
Nutritional Benefits
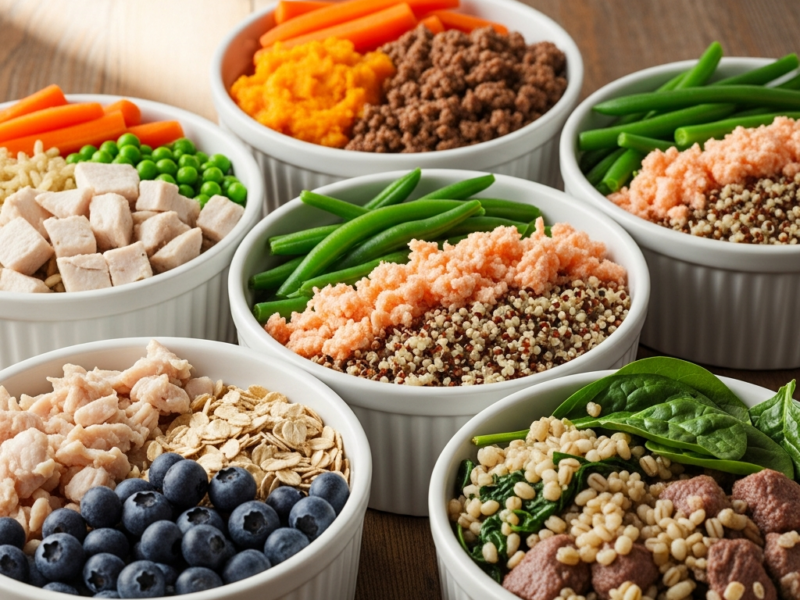
When you use fresh, whole ingredients, you’re naturally providing a more nutritious treat. Cooking at home helps retain more vitamins and minerals compared to heavily processed options. Our sweet potato and chicken recipe specifically focuses on ingredients known for their health benefits for dogs.
These homemade biscuits can complement their regular diet by offering wholesome nutrients in a tasty package. It is all about adding natural goodness to their snack time.
Strengthen Your Bond
The act of making something special for your dog is a gesture of love. When you offer a homemade treat, it strengthens the bond between you. Dogs are incredibly perceptive and can sense the care you put into their well-being.
Using these treats for training or just as a simple reward reinforces positive behavior and builds trust. It’s a tangible way to express your affection and make them feel cherished.
The Power of Four: Key Ingredients Explained
Our recipe shines because of its simplicity and the powerful nutrients packed into just four main ingredients. Let’s take a closer look at why each one is a fantastic choice for your canine companion.
Sweet Potato: A Nutritional Superstar
Sweet potatoes are much more than just a tasty orange vegetable; they are a nutritional powerhouse for dogs. They offer a wealth of health benefits.
* Rich in Fiber: Excellent for digestive health, helping to regulate bowel movements and prevent constipation.
* Vitamins Galore: Loaded with Vitamin A (important for vision, growth, and immune function), Vitamin C (an antioxidant that supports the immune system), and several B vitamins (crucial for metabolism and energy).
* Essential Minerals: Contains minerals like potassium, which is vital for nerve and muscle function.
* Natural Sweetness: Dogs naturally love the taste, making it a highly palatable ingredient without needing added sugars.
Cooked Chicken: Lean Protein Powerhouse
Chicken is a staple in many dog foods for a good reason. It’s a lean, highly digestible source of protein that dogs generally adore.
* High-Quality Protein: Essential for building and maintaining strong muscles, repairing tissues, and supporting overall growth.
* Amino Acids: Provides vital amino acids necessary for a dog’s body to function optimally.
* Energy Source: A great source of energy to keep your dog active and playful.
* Palatability: Most dogs find plain, cooked chicken incredibly delicious, making these treats a surefire hit. Always use plain, cooked chicken without any seasonings, onions, or garlic, which can be harmful to dogs.
Whole Wheat Flour (or Alternative): The Binder
Flour is what holds our biscuits together, giving them structure and a satisfying texture. Whole wheat flour is often a good choice for dogs.
* Source of Fiber: Adds a little extra fiber to the treats, which contributes to digestive health.
* Texture and Structure: Provides the necessary binding properties to create firm, chewable biscuits.
* Nutrients: Contains some B vitamins and minerals.
Flour Alternatives for Sensitive Pups
If your dog has a grain sensitivity, or you prefer a grain-free option, you can easily swap whole wheat flour for alternatives like:
* Oat Flour: A naturally grain-free option, often well-tolerated and adds more fiber.
* Rice Flour: Another good grain-free alternative, available in white or brown varieties.
* Chickpea Flour: Offers additional protein and is grain-free.
Remember that different flours absorb liquid differently, so you might need to adjust the amount slightly to achieve the right dough consistency.
Egg: Nature’s Glue and Nutrient Boost
Eggs are incredible little packages of nutrition, and they play a dual role in our biscuit recipe.
* Binder: The protein in eggs helps to bind all the ingredients together, creating a cohesive dough that holds its shape when baked.
* Nutrient-Rich: Eggs are a complete protein source, providing all essential amino acids. They also contain healthy fats, vitamins A, D, E, and B vitamins, as well as minerals like selenium.
* Enhances Palatability: Many dogs love the taste of eggs, adding another layer of deliciousness to the treats.
Step-by-Step Guide to Baking Bliss
Ready to whip up some deliciousness for your furry friend? This recipe is super straightforward, even if you’re new to baking.
Gathering Your Simple Supplies
Before you start, make sure you have everything you need within reach.
Ingredients:
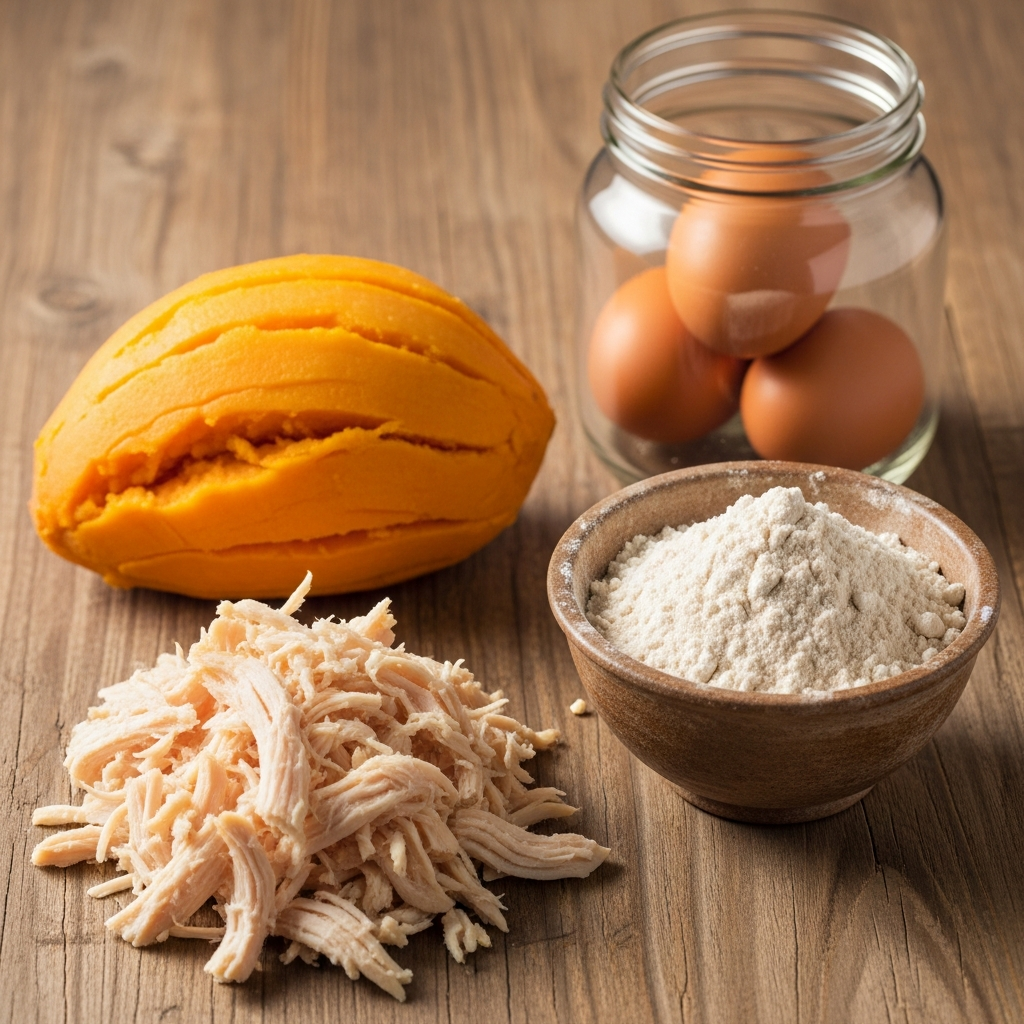
* 1 large sweet potato (about 1.5 cups mashed)
* 1 cup cooked, shredded chicken (plain, no seasoning)
* 1 large egg
* Approximately 2 cups whole wheat flour (or alternative like oat flour)
Equipment:
* Large mixing bowl
* Potato masher or fork
* Rolling pin
* Cookie cutters (any shape your heart desires!)
* Baking sheet
* Parchment paper
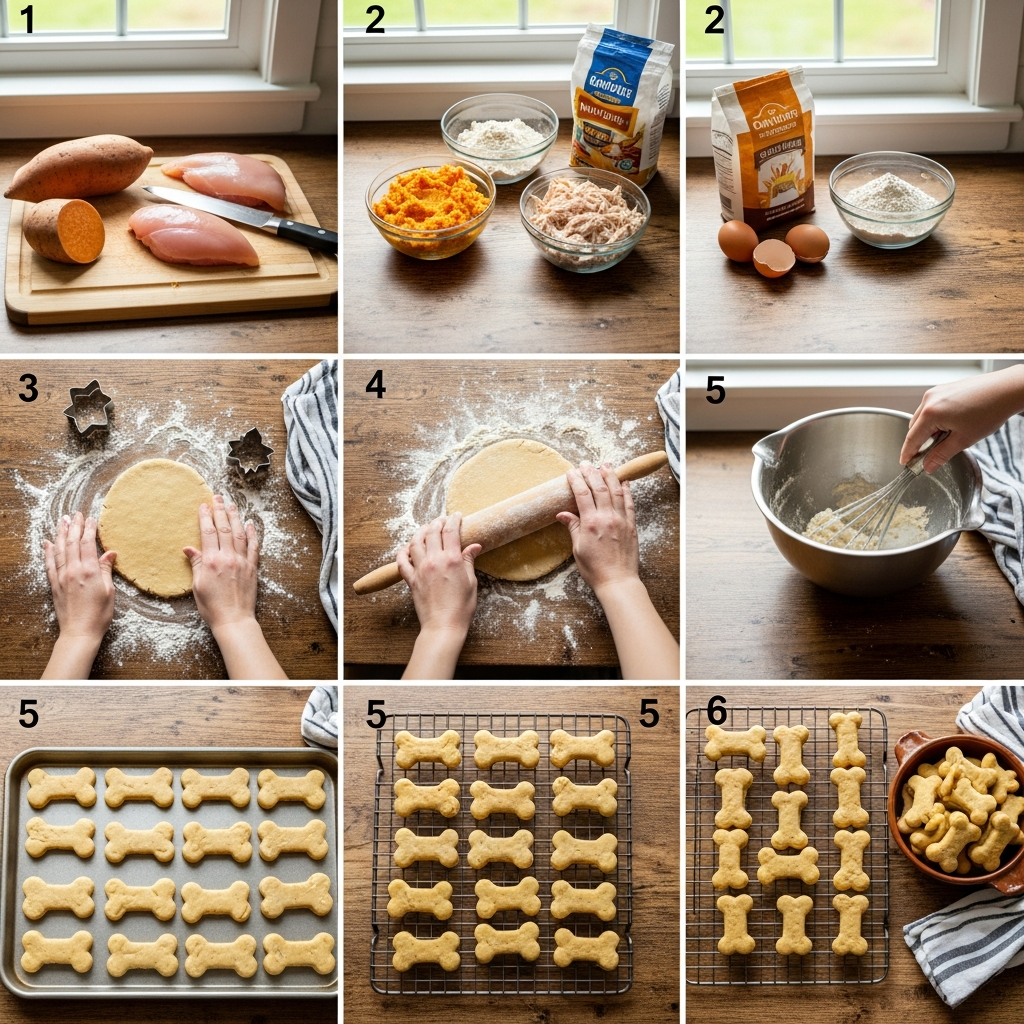
Preparing Your Ingredients
A little prep work makes the baking process smooth and enjoyable.
1. Cook the Sweet Potato: Wash the sweet potato thoroughly. You can boil it (peeled and diced for faster cooking), steam it, or bake it whole. Cook until it is very tender and easily mashed. Once cooked, let it cool completely. Then, peel off the skin and mash it well.
2. Cook the Chicken: Use plain, boneless, skinless chicken breast or thigh. You can boil it, bake it, or steam it until fully cooked. Make sure there are no seasonings, salt, or oils. Once cooked, let it cool completely, then shred it finely or chop it into very small pieces.
Mixing the Magic Dough
This is where the four ingredients come together to form a wonderful dough.
1. Combine Wet Ingredients: In your large mixing bowl, add the mashed sweet potato, shredded chicken, and the egg. Mix these three ingredients together thoroughly. You can use a spoon, a sturdy spatula, or even clean hands for this step.
2. Add Flour Gradually: Start by adding 1.5 cups of the whole wheat flour to the wet mixture. Mix it in until combined.
3. Knead and Adjust: Turn the dough out onto a lightly floured surface. Knead the dough for a few minutes. If the dough is too sticky, gradually add more flour, a tablespoon at a time, until it forms a firm, workable dough that is not too sticky but also not dry and crumbly. The exact amount of flour can vary depending on the moisture content of your sweet potato and chicken.
Rolling and Cutting Your Treats
Time to shape those delicious biscuits!
1. Preheat Oven: Preheat your oven to 350°F (175°C). Line a baking sheet with parchment paper.
2. Roll the Dough: On a lightly floured surface, use your rolling pin to roll out the dough to about 1/4 inch thick. Aim for an even thickness so all your biscuits bake uniformly.
3. Cut Shapes: Use your favorite cookie cutters to cut out shapes. Dog bone shapes, circles, or even hearts are fun options. Reroll any dough scraps until all the dough is used.
4. Arrange on Sheet: Place the cut-out biscuits onto the prepared baking sheet, leaving a little space between each one.
Baking to Perfection
The smell of baking dog treats is truly wonderful!
1. Bake: Place the baking sheet in the preheated oven and bake for 20-25 minutes.
2. Check for Doneness: The biscuits should be firm to the touch and lightly golden brown around the edges. If you prefer a crunchier biscuit, you can bake them for a few extra minutes, but watch carefully to prevent burning.
3. Cool Completely: Once baked, remove the biscuits from the oven and transfer them to a wire rack to cool completely. This is a very important step; cooling them fully helps them firm up and achieve the desired texture.
Storage, Serving, and Shelf Life
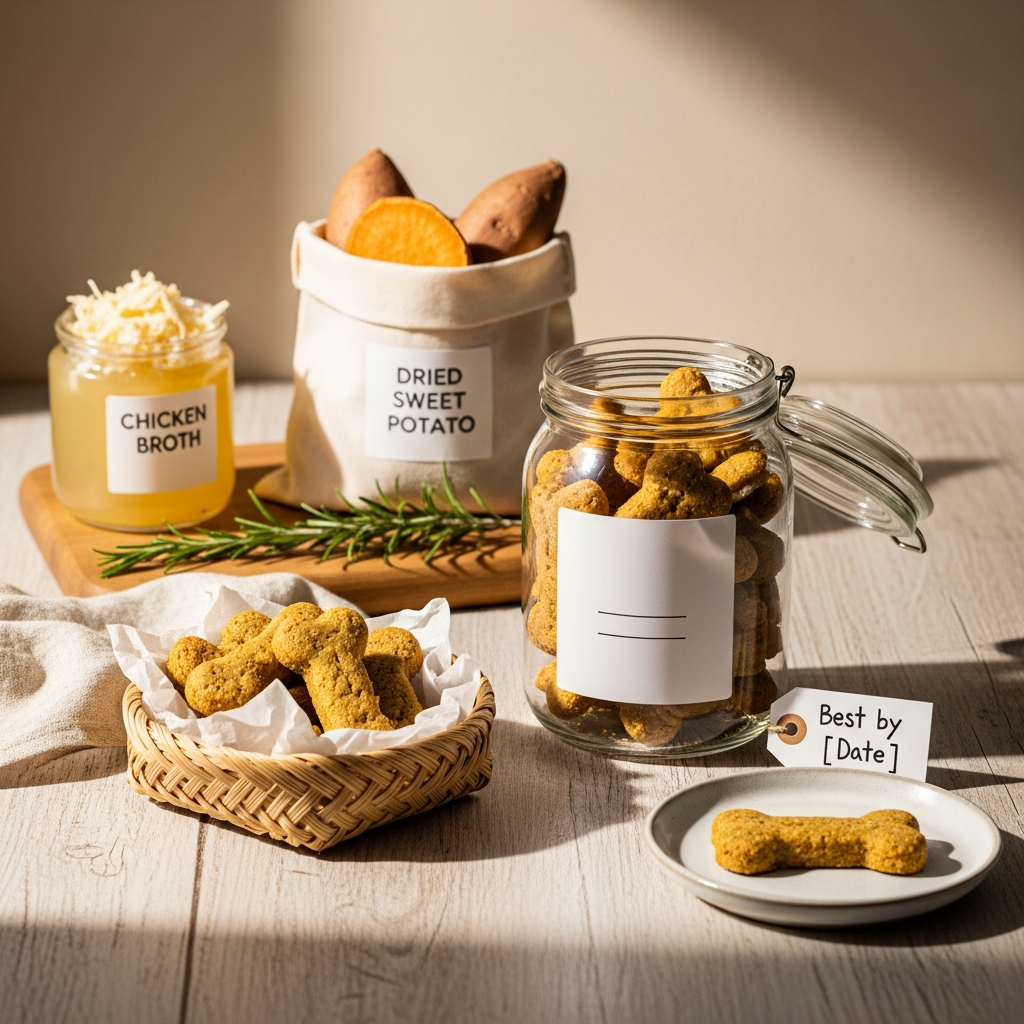
You’ve put love into making these treats, so let’s make sure they stay fresh and are served correctly.
Proper Storage for Freshness
Proper storage is key to making your homemade treats last.
* Airtight Container: Always store the biscuits in an airtight container to keep them fresh and prevent them from drying out.
* Countertop: For immediate consumption (within 3-5 days), you can store them on the counter at room temperature.
* Refrigerator: To extend their freshness, keep the biscuits in an airtight container in the refrigerator for up to 7-10 days.
* Freezer: For longer storage, you can freeze the biscuits for up to 2-3 months. Place them in a freezer-safe bag or container. Thaw them at room temperature or in the refrigerator before serving.
How Many Treats Can My Dog Have?
Even healthy treats should be given in moderation as part of a balanced diet.
* The 10% Rule: A general guideline is that treats should not make up more than 10% of your dog’s daily caloric intake.
* Consider Your Dog’s Size: Smaller dogs will naturally get fewer treats than larger dogs.
* Activity Level: Very active dogs might handle a few more treats than couch potatoes.
* Existing Diet: Factor in their regular dog food portion sizes. If you’re giving more treats, you might need to slightly reduce their meal portions to avoid overfeeding.
Always consult your veterinarian if you have specific concerns about your dog’s diet or treat consumption.
Sample Daily Feeding Guide
This is a general guideline; adjust based on your dog’s specific needs and your vet’s advice.
| Dog Size | Example Breeds | Recommended Biscuits Per Day |
| Small (5-20 lbs) | Chihuahua, Pomeranian, Yorkie | 1-2 small biscuits |
| Medium (21-50 lbs) | Beagle, Corgi, Bulldog | 2-3 biscuits |
| Large (51-90 lbs) | Labrador, German Shepherd | 3-4 biscuits |
| Extra Large (90+ lbs) | Great Dane, Mastiff | 4-5 biscuits |
Remember, these are treats, not a meal replacement.
Shelf Life Expectancy
Knowing how long your homemade goodies will last helps you plan your baking and storage.
* Room Temperature: Up to 3-5 days.
* Refrigerator: Up to 7-10 days.
* Freezer: Up to 2-3 months.
Always check for any signs of spoilage before giving a treat, such as mold, off-smell, or unusual sliminess. When in doubt, throw it out!
Customizing Your Canine Creations (Optional Additions)
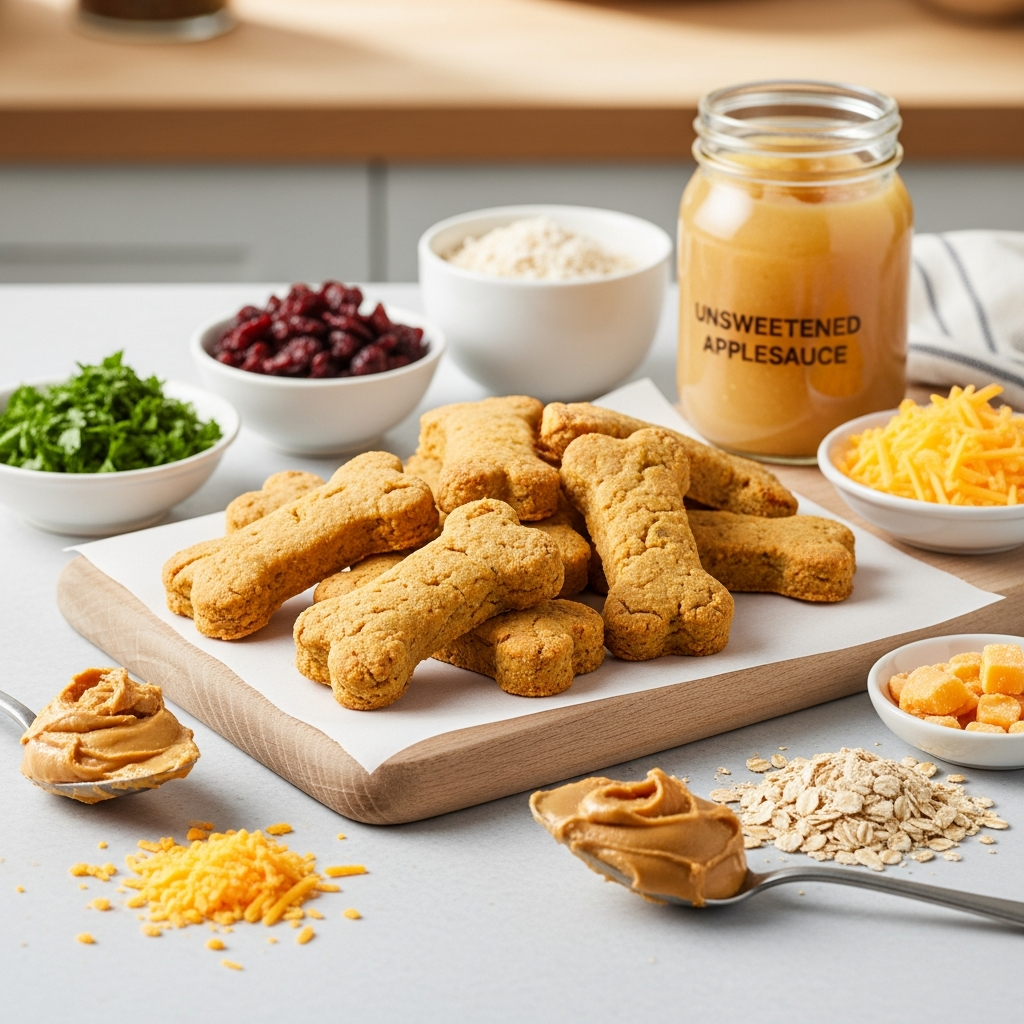
While the core recipe is designed to be simple and use only four ingredients, you can certainly think about variations for future batches once you’ve mastered the basic recipe. These are just ideas for optional additions, not part of the core 4-ingredient recipe.
Ingredient Swaps for Sensitivities
As mentioned earlier, flour is the easiest ingredient to swap if your dog has sensitivities.
* Flour Alternatives: Oat flour, rice flour, or chickpea flour are excellent grain-free choices if your dog is sensitive to wheat. Adjust liquid content as needed.
* Protein Alternatives: If your dog can’t have chicken, you can use plain, cooked, and shredded turkey, or even a small amount of plain, cooked fish like salmon (ensure all bones are removed).
Boosting Nutrition (Optional)
For those who want to experiment with adding a little extra nutritional punch, here are some ideas for future batches:
* Fresh Parsley: A tiny sprinkle (about 1 teaspoon for the whole batch) can help with doggy breath.
* Chia Seeds: A pinch (1/2 teaspoon) can add omega-3 fatty acids for skin and coat health.
* Turmeric: A very small amount (1/4 teaspoon) can offer anti-inflammatory benefits, but consult your vet first, as too much can cause stomach upset.
* Unsweetened Peanut Butter: A tablespoon can be mixed in for extra flavor and protein, but ensure it’s xylitol-free (xylitol is toxic to dogs).
Always introduce new ingredients slowly and in small amounts to monitor your dog’s reaction.
Troubleshooting Common Dog Biscuit Baking Issues
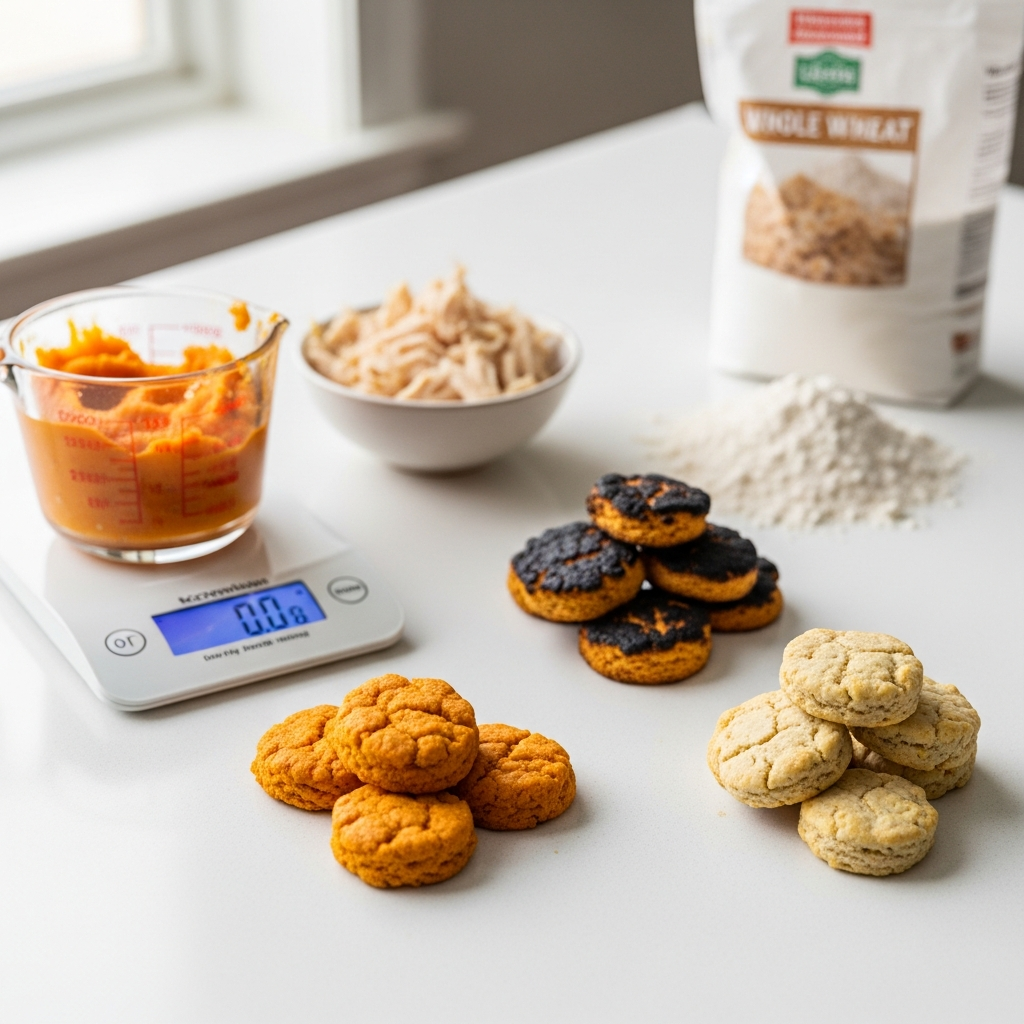
Even with a simple recipe, sometimes things don’t go exactly as planned. Don’t worry, here are some quick fixes for common issues.
Dough Too Sticky or Dry?
* If the dough is too sticky to roll: Gradually add a tablespoon of flour at a time and knead it in until you reach a workable consistency. The moisture content of sweet potatoes can vary, so don’t be afraid to adjust.
* If the dough is too dry and crumbly: Add a tiny splash of water (about half a teaspoon) or a little unsweetened applesauce (if using only 4 ingredients, stick to water or a tiny bit more mashed sweet potato) and knead until it comes together.
Biscuits Not Firm Enough?
* This usually means they need more baking time. Put them back in the oven for an additional 5-10 minutes.
* Ensure they are completely cooled on a wire rack. They will firm up considerably as they cool.
* Check the thickness. Thinner biscuits tend to be crispier.
My Dog Won’t Eat Them!
* Every dog has their own preferences. Try baking them slightly longer for a crunchier texture, as some dogs prefer that.
* Ensure your chicken is finely shredded or minced; large chunks might be off-putting to some.
* Try different shapes or sizes. Sometimes a small change can make a difference.
* If all else fails, perhaps your dog just isn’t a fan of sweet potato. You can try a different veggie base next time, but this particular combination is usually a winner!